How to Win Klondike Solitaire: Proven Tips & High-Score Strategies
Most card players think Klondike Solitaire is pure luck. They deal seven columns, flip cards mindlessly from the stockpile, hit a dead end, and deal again.
They lose four games out of five. Then they assume the deck was stacked against them.
The truth is mathematical. While the cards fall randomly, your win rate is governed by systematic decision trees. In Turn-1 Klondike, a disciplined player can win over 80 percent of games. In Turn-3 Klondike, skilled play pushes win rates past 40 percent, compared to the 10 percent average of casual stackers. Turning losses into wins requires treating the seven tableau columns not as decorative stacks, but as an information puzzle where hidden cards represent your primary currency.

The Mathematical Structure of Klondike
Klondike operates under strict combinatorial constraints using a standard 52-card deck.
The game layout divides the cards into three distinct operational zones:
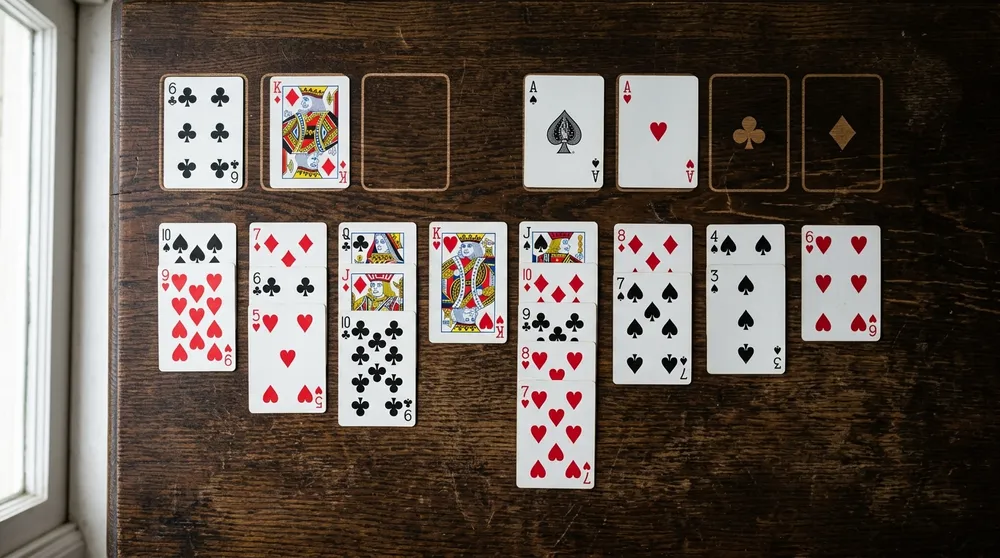
1. The Tableau: 28 cards dealt across seven columns. The first column holds one card, the second holds two, continuing up to seven cards in the final column. Only the top card of each column starts face up. That leaves 21 hidden cards trapped beneath the surface.
2. The Stockpile: 24 cards held face down in reserve. In Turn-1 mode, you reveal cards individually. In Turn-3 mode, cards pass through the waste in triplets.
3. The Foundations: four empty goal spaces built upward by suit from Ace through King.
The central mathematical bottleneck of Klondike is hidden entropy. You begin the game with 21 cards completely concealed in the tableau and 24 cards unseen in the stock. Only 7 cards are visible. Winning does not come from rushing cards to the upper foundations. Winning comes from stripping away the 21 hidden cards in the tableau before your stockpile options lock up.
The Rule of Foundation Equilibrium
The single most destructive habit in Solitaire is promoting cards to the foundations too quickly.
You see an Ace of hearts appear, so you slide it to the foundation. An Ace of spades follows. Then you uncover a Two of hearts and send it up. Moments later, a Three of hearts appears and you push it to the foundation as well.
Three turns later, you uncover a black Two in column six. To free the four face-down cards trapped underneath that black Two, you desperately need a red Three in the tableau to act as an anchor. But your red Three is locked away in the foundation. Your board freezes. You lose.

The N-Minus-One Protection Protocol
Never promote a card of rank N to the foundation unless both cards of rank N-1 of the opposite color are already visible and secured on the board.
Aces and Twos are exempt from this rule. You should send Aces and Twos to the foundations the exact second they appear. An Ace can never hold another card in the tableau because no card ranks lower than an Ace. A Two can only hold an Ace, which belongs in the foundation anyway. Promoting Aces and Twos carries zero tactical risk.
For Threes and higher, enforce the equilibrium rule strictly:
1. Before sending the 4 of spades to the foundation, check the board for the 3 of hearts and the 3 of diamonds.
2. If either red Three is still hidden beneath a face-down column, keep that black 4 in the tableau.
3. That black 4 serves as a vital landing pad. The moment that buried red 3 surfaces, you can attach it to the black 4, instantly exposing another face-down card.
If you send the black 4 to the foundation prematurely, the red 3 becomes dead weight when it finally appears. Standard tournament scoring penalizes pulling cards down from the foundations. Treat every foundation move above rank Two as an irreversible commitment.
Tableau Column Depth: The Hierarchy of Unlocking
When you face multiple legal moves on the board, how do you decide which card to shift?
Casual players pick the first legal move their eyes land on. Expert players evaluate column depth.
Every face-down card in your tableau represents an obstacle blocking critical information. But the seven columns are not created equal. Column one has zero hidden cards. Column seven has six hidden cards.
When choosing which card to move, follow this strict descending order of priority:
1. Moves that expose face-down cards in the deepest columns (columns 7, 6, and 5).
2. Moves that expose face-down cards in mid-tier columns (columns 4 and 3).
3. Moves from the waste pile that directly unlock a face-down tableau card.
4. Moves that shift cards between visible stacks without revealing a new card.
Consider a practical example. You have a red 8 in column two that can move onto a black 9 in column three. Doing so exposes the single hidden card in column two. At the same time, you have another red 8 in column seven that can also move onto that black 9. Column seven contains five hidden cards.
Moving the red 8 from column seven is vastly superior. Column two only contains one hidden card; clearing it gives you very little long-term tactical value. Column seven contains five hidden cards. Unlocking column seven immediately reduces board entropy and gives you five successive opportunities to locate key connectors, Aces, and Kings.

The Myth of the Empty Column: King Placement Discipline
Clearing an entire column feels like an achievement. Players rush to move cards away, celebrating an empty space.
An empty column is useless unless you have a King ready to fill it. In fact, an empty space without a King is a massive tactical disadvantage.
The rules of Klondike dictate that only a King, or a sequence beginning with a King, can occupy a vacant tableau column. If you clear out column four, but you have no King in your hand or in the waste pile, you have effectively reduced your playing field. You now have six active working columns instead of seven. You have constrained your maneuverability.
Choosing Between Competing Kings
When an empty column opens and you hold two different Kings, never guess. Choose the King that matches the current blockage on your board.
Analyze the colors of the Kings:
1. Look at the face-up cards currently blocking your deepest columns. If columns six and seven are blocked by heavy red cards (such as a red Jack and a red 9), placing a Black King in the open slot creates a landing sequence for those specific problem cards.
2. Look at the cards immediately available to build on the King. If you hold a red King and a black King, check your hand for Queens and Jacks. Placing a black King when you have a red Queen and black Jack ready to follow creates an instant three-card working sequence.
3. Check the cards buried under the Kings. If one of the Kings is currently sitting atop four face-down cards in column five, shifting that King into the vacant column takes absolute priority over playing a King from the stockpile.
Never drop a King into an empty column simply because it is available. If that King has no matching Queen in sight and uncovers zero hidden cards, leave the column open until a productive sequence emerges.
Turn-3 Stockpile Tracking and Cadence Manipulation
Turn-3 Klondike is where casual players surrender. Because cards pass through the waste pile in groups of three, two-thirds of the stockpile cards appear unreachable on the first run.
Cards in Turn-3 do not move randomly. They follow a rigid mathematical cycle.
When you flip through the stock in Turn-3, cards appear in fixed triplets: cards 1-2-3, then 4-5-6, then 7-8-9. On that first pass, you can only play the third card of each triplet (cards 3, 6, 9, and so on).
Every time you pull an accessible card from the waste pile, you permanently alter the alignment of every single triplet behind it in the deck.
The Offset Shift Technique
Suppose your waste pile displays a triplet ending in the 10 of clubs, with an 8 of diamonds directly behind it. You need that 8 of diamonds to unlock column six, but the 10 of clubs blocks it.
Do not panic. You have two tactical options:
1. Find a legal home for the 10 of clubs immediately in the tableau. Once the 10 is played, the card behind it becomes instantly accessible on the current turn.
2. If the 10 cannot be played now, remember its position. When you recycle the deck, pulling any single card earlier in the cycle will shift the entire deck alignment by one. The 8 of diamonds, which was previously trapped in the second position of the triplet, will rotate into the third position on the next pass, making it fully playable.
Top players run through the entire stock once without making marginal plays. They map the locations of key cards. Then, on the second pass, they deliberately extract a single low card to shift the deck's polarity, bringing buried winning cards right to the surface.
Scoring Models: Standard vs. Vegas Rules
Your tactical choices must change depending on which ruleset you play:
| Strategic Factor | Standard Klondike Scoring | Vegas Solitaire Rules |
| :--- | :--- | :--- |
| Primary Objective | Maximize points through speed and moves | Earn positive cash balance over $52 buy-in |
| Foundation Value | +10 points per card moved to foundation | +$5 per card placed in foundation |
| Tableau Revelation| +5 points per face-down card exposed | $0 direct reward (value is purely tactical) |
| Deck Recycling | Multiple passes allowed (point penalties apply)| Strictly 1 or 3 passes through the deck total |
| Foundation Reversal| -15 points per card pulled down to tableau | Permitted, but costs $5 credit |
| Target Win Condition | High score leaderboard ranking | 11+ cards to foundation to break even ($55) |
In Standard scoring, you are incentivized to uncover every face-down card and cycle the deck to maximize completions. In Vegas rules, you pay $52 upfront ($1 per card), and every card placed into the foundations returns $5. Placing 11 cards pays $55, securing a profit. Under Vegas rules, you must be far more conservative. Rushing cards into foundations can be correct if you need to hit the 11-card threshold to guarantee a profitable hand.
The Five-Step Deadlock Recovery Checklist
When your game grinds to a halt and no obvious moves remain, do not abandon the board. Work through this diagnostic checklist in exact order:
1. Audit the foundations for retrieval: Check if pulling a card down from the foundation onto the tableau creates an alternate branch. Lowering a black 5 back onto a red 6 can unlock a trapped red 4 that holds three face-down cards underneath.
2. Re-examine King choices: If an empty column is occupied by a dead-end King that uncovers nothing, check if undoing the move and placing the alternate King unlocks a deep column.
3. Calculate triplet offsets: In Turn-3 mode, determine if playing one disposable card from the waste will re-index the deck to surface a critical blocker on the next pass.
4. Scan for lateral shifts: Look for opportunities to move an entire packed sequence between two identical parent cards (such as moving an 8-7-6 block from a black 9 in column two to a black 9 in column five). This lateral transfer can expose a buried card in the originating stack.
5. Re-evaluate waste card sacrifices: Determine whether playing a card from the waste to an empty column allows you to shift a blocking card out of the way, even if it does not yield an immediate foundation point.
Solitaire is not an idle pastime of mechanical clicks. It is a puzzle of probabilities, risk control, and space preservation. By prioritizing hidden cards, respecting foundation equilibrium, and manipulating deck cadence, you transform Klondike from a game of chance into a game of mastery.
Download Free Klondike Solitaire Rules & Strategy Cheat Sheet (PDF)
Save a copy to your computer or print for your classroom or game club.

Game developer and founder at Unicorn Games. Specializes in combinatorial game theory, solvability algorithms, and classic card & puzzle game development. Every guide is fact-checked against mathematical game states and empirical play benchmarks.