How to Win at Ludo: Board Geometry, Pawn Distribution, and Capture Probability
Casual players treat Ludo as a mindless roll-and-move contest. They shake the dice cup, push whichever token catches their eye, and blame bad dice when their pawns get captured. They push one token all the way around the board while three remaining pawns sit trapped in the starting yard.
Ludo is a deterministic race governed by board geometry, risk hedging, and probability curves. The die dictates the number of steps. Tactical decision-making dictates which token absorbs that number. Master players do not rely on lucky sixes. They engineer safe board positions, establish blockades on key choke points, and maintain striking distances that punish careless opponents.
You can test these movement principles immediately without download by playing Ludo on Unicorn Games directly in your browser.
Historical Origin and the Geometric Layout of Ludo
Ludo originated in sixth-century India as Pachisi, an ancient cross-and-circle board game. Murals in the Ajanta Caves in Maharashtra depict the game being played by royal courts. The Mughal Emperor Akbar played a life-sized version in palace courtyards using court attendants as living pawns. In 1896, Alfred Collier patented a simplified version of the game in England under the name Ludo, derived from the Latin word meaning "I play."
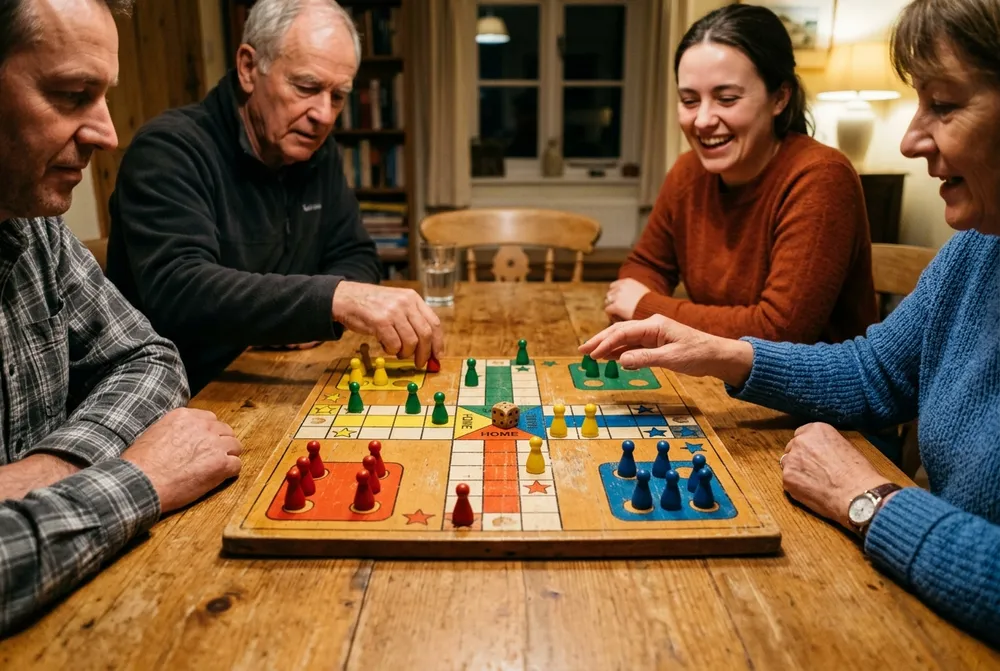
The physical board structure of Ludo is an exact mathematical circuit:
Every pawn must travel around the 52-square circuit in a clockwise direction, enter its designated private colored corridor, and land precisely in the central Home triangle. The first player to bring all four pawns home wins the match.
The Probability of the Die: Sixes and Strike Zones
Every turn in Ludo hinges on a standard six-sided die. Because the die has six faces numbered 1 through 6, every number has an identical single-roll probability of:
$$P(N) = \frac{1}{6} \approx 16.67\%$$
Understanding this static probability transforms how you position pawns along the outer track.

The Release Threshold from the Yard
Pawns cannot enter the active circuit until you roll a six. Many players become frustrated when a six does not appear immediately.
The probability of failing to roll a six over $T$ consecutive turns is:
$$P(\text{No Six in } T \text{ turns}) = \left(\frac{5}{6}\right)^T$$
| Turns Waited ($T$) | Probability of at Least One Six | Odds of Remaining Trapped |
|---|---|---|
| 1 turn | 16.67% | 83.33% |
| 2 turns | 30.56% | 69.44% |
| 3 turns | 42.13% | 57.87% |
| 4 turns | 51.77% | 48.23% |
| 6 turns | 66.51% | 33.49% |
| 10 turns | 83.85% | 16.15% |
By turn four, you have an even chance of releasing a pawn. By turn ten, the probability of remaining trapped drops below seventeen percent. Do not panic during early dry spells. Focus on positioning the pawns you already have active.
The Six-Square Threat Zone
An enemy pawn located between one and six squares behind you represents an immediate seventeen percent threat of execution on their very next roll.
If an enemy pawn sits exactly seven squares behind you, their single-roll capture probability drops to zero. They cannot reach you in a single roll without rolling a six first, followed by a one. The combined probability of rolling a six followed by a one on consecutive rolls is:
$$P(6 \text{ then } 1) = \frac{1}{6} \times \frac{1}{6} = \frac{1}{36} \approx 2.78\%$$
Keeping your pawns seven or eight squares ahead of pursuing opponents reduces your capture risk from nearly seventeen percent down to less than three percent.
The Four-Pawn Fleet Strategy: Why Single-Pawn Rushing Fails
Amateur players consistently commit the error of the Single-Pawn Rush. They roll a six, release one pawn, and advance that single piece continuously while leaving their other three pawns locked inside the yard.
This strategy collapses against competent opposition.
When you advance only one pawn:
1. You provide pursuing opponents with a single isolated target.
2. You lose all movement flexibility. When you roll an awkward number that lands on a dangerous square, you have no alternative piece to move.
3. If that solitary pawn gets cut forty squares into its journey, you lose forty turns of movement equity in a single split second.
The superior strategy is the Four-Pawn Fleet. Release all four pawns as quickly as sixes allow. Maintain an advancing wave of pieces separated by five to eight squares across the board.
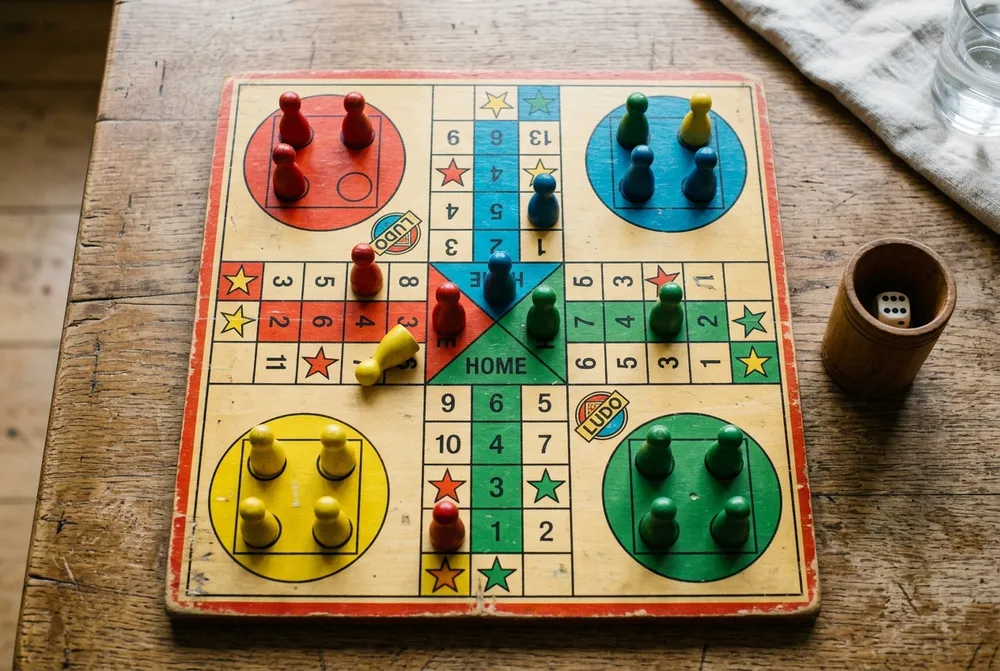
A distributed fleet provides three massive operational advantages:
1. Universal movement options: When a roll of four would place pawn A in danger, you can advance pawn B, C, or D instead.
2. Cross-board capture nets: Your pawns cover multiple quadrants of the 52-square track, allowing you to intercept enemy pieces wherever they land.
3. Redundancy against captures: If one pawn gets sent back to the yard, your three other pawns continue advancing toward the home corridor.
Safe Star Squatting and Ambush Zones
The eight star-marked squares on the Ludo track are invulnerable safe zones. When a pawn rests on a star, no opponent can capture it, regardless of their roll.
Master players use star squares as forward operating bases.
Apply these positioning rules for safe squares:
Rule 1: The Choke Point Anchor
Park a pawn on the safe star square located directly outside an opponent starting base. Every time that opponent rolls a six and releases a new token, your anchored pawn sits directly behind them or within easy striking distance.
Rule 2: Staging Before the Gauntlet
The final quadrant before your home straight is the most contested area of the board. Park your pawn on the star square preceding your colored corridor. Wait there until you roll a number that takes you directly into the safety of your private colored path. Never leave a safe star to sit exposed on an open white square just three tiles before your home gate.
Rule 3: Star Squatting Under Pressure
If a pursuing enemy is closing in from two or three squares behind, move your pawn onto the nearest star square and freeze it. Leave it on that star while using subsequent dice rolls to advance other pawns across the board. Forcing an opponent to pass your protected star square shifts the predatory balance in your favor.
Capture Mechanics and the Bonus Turn Multiplier
Capturing an opponent pawn produces a seismic swing in match equity:
1. The enemy piece is wiped off the track and returned to its starting yard.
2. The opponent loses every single square of travel that piece had accumulated.
3. You receive an immediate bonus roll.
Capturing should always take precedence over passive advancement, provided your capturing pawn lands on a safe square or maintains distance from other pursuing threats.
Calculate the net turn differential of every capture:
If you cut an enemy pawn that has traveled thirty-two squares along the perimeter, you erase thirty-two turns of opponent progress. Adding your bonus roll, that single move yields a net swing of thirty-three movement steps.
Target the lead pawns of your opponents. Cutting a pawn that is three squares away from its home straight inflicts catastrophic psychological and mathematical damage on the rival player.
The Home Straight Bottleneck and the Exact-Roll Rule
Once a pawn enters its designated colored corridor, it is completely immune to enemy capture. No opponent pawn can enter your private home track.
However, the final stretch introduces a new hazard: the exact-roll bottleneck.
To enter the central Home triangle from the fifth colored square, you must roll an exact one. If your pawn sits on the fourth square, you need an exact two. Rolling a number higher than the distance to Home results in a wasted turn where the pawn cannot move.
Navigate the bottleneck using this protocol:
1. Bring pawns to the gate in pairs: Do not park a pawn on the fifth colored square waiting for an exact one while your other pawns linger back in the dangerous common track. Advance trailing pieces up to the home corridor entrance so you always have valid movement targets for higher numbers (4, 5, 6).
2. Use high rolls on trailing pieces: When you roll a five or six, use those numbers to advance pawns that are still on the outer track. Save smaller rolls (1, 2, 3) to clear pieces trapped in the colored corridor.
3. Avoid traffic jams on tile five: If three of your pawns cluster on colored square five, you can only move when you roll a one. That reduces your useful roll probability to one in six. Keep your pawns staggered across squares two, three, and four to accept rolls of one, two, and three simultaneously.
Four-Step Turn Decision Hierarchy
To achieve a win rate above seventy-five percent in four-player matches, evaluate every roll using this systematic order of operations:
1. Release check: Did you roll a six? If yes, is there a pawn still sitting in your yard? Unless an existing active pawn has a guaranteed capture or can reach a safe star, deploy the fresh pawn immediately.
2. Capture execution: Can any active pawn land directly on an exposed enemy pawn? If the landing square is safe or leaves you outside immediate retaliatory range, execute the cut to gain the bonus roll.
3. Safety docking: Can any exposed pawn reach a safe star square or enter the colored home corridor? Prioritize moving endangered pieces into invulnerable positions.
4. Fleet advancement: If no releases, captures, or safety dockings are available, advance the trailing pawn that minimizes risk. Move pawns into positions seven or eight squares ahead of approaching enemies.
Frequently Asked Questions
Under standard international tournament rules, rolling three consecutive sixes invalidates the entire turn. The third six cannot be used, no move is made, and play passes immediately to the next player. This prevents infinite-turn abuse.

Game developer and founder at Unicorn Games. Specializes in combinatorial game theory, solvability algorithms, and classic card & puzzle game development. Every guide is fact-checked against mathematical game states and empirical play benchmarks.